#### 1. **Prepare the Mold:**
Begin by preparing a small baking dish or candy mold. Grease the dish lightly or line it with parchment paper. Alternatively, you can use a silicone candy mold for perfectly shaped gumdrops. If you’re using a baking dish, you’ll need to dust it with cornstarch to prevent the gumdrops from sticking.
#### 2. **Heat the Juice:**
In a saucepan, combine the **fruit juice** and **lemon juice**. Place the saucepan over medium heat, and bring it to a simmer. Stir in **citric acid** (if using), and then add the **sugar**. Stir continuously until the sugar has dissolved, creating a syrupy mixture. This step helps infuse the juice with sweetness and ensures the gumdrops have a smooth texture.
#### 3. **Dissolve the Gelatin:**
In a separate small bowl, sprinkle the **gelatin** over a few tablespoons of cold juice or water to let it “bloom”—this allows the gelatin to absorb the liquid and swell. After a few minutes, once the gelatin has absorbed the liquid, add it to the warm juice mixture, stirring constantly until the gelatin completely dissolves.
#### 4. **Cook the Mixture:**
Continue to cook the juice and gelatin mixture over low heat for another **5-7 minutes**, stirring to ensure the gelatin is fully incorporated and the mixture has thickened slightly. If you’re using food coloring, add it to the mixture at this point, stirring well to distribute the color evenly.
#### 5. **Pour into the Mold:**
Carefully pour the gumdrop mixture into your prepared mold or baking dish. Use a spoon or spatula to smooth the top and ensure an even layer. Allow the mixture to cool slightly before moving it to the refrigerator.
#### 6. **Refrigerate and Set:**
Refrigerate the gumdrop mixture for at least **4 hours** or until it has set completely and become firm. The gelatin will help the gumdrops hold their shape as they cool.
#### 7. **Cut the Gumdrops:**
Once set, remove the gumdrops from the mold or cut the mixture in the dish into small cubes or squares. If you’ve used a silicone mold, you can simply pop the gumdrops out of the mold.
#### 8. **Coat with Sugar:**
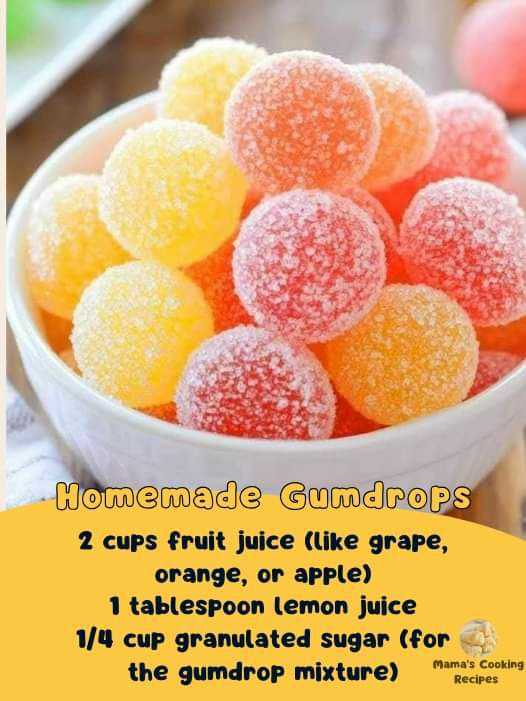
Pour some **granulated sugar** onto a plate or in a shallow bowl. Roll each gumdrop in the sugar to coat it completely, giving it that signature sparkle and sweetness. This step helps to keep the gumdrops from sticking together and adds a delightful crunch to each bite.
#### 9. **Let Them Dry:**
Place the sugar-coated gumdrops on a baking sheet or tray lined with parchment paper to dry for another **1-2 hours**. Once dry, they are ready to be served, packed up, or enjoyed!
### Tips for the Perfect Homemade Gumdrops
– **Use fresh juice**: Fresh fruit juice creates the best flavor in these gumdrops, but store-bought juice works as well. Just make sure to choose one without added sugars or artificial flavors.
– **Experiment with flavors**: While citrus-based juices (like orange or lemon) are popular for gumdrops, you can try using cranberry, apple, or even mixed berry juices for a different twist.
– **Adjust the sweetness**: If you prefer your gumdrops to be sweeter or less sweet, feel free to adjust the amount of sugar to your taste. You can also add honey or maple syrup for a natural alternative.
– **Use different molds**: You can get creative with your gumdrops and use fun-shaped silicone molds for holidays or themed parties, such as hearts, stars, or seasonal shapes like pumpkins or snowflakes.
– **For a sour version**: If you want your gumdrops to have a sour punch, mix **citric acid** into the sugar coating before rolling the gumdrops. This will give them that signature sour candy taste.
### Why You Should Make Homemade Gumdrops
Homemade gumdrops are a fun and delicious way to bring back the flavors of childhood. They offer a chewy, fruity treat that’s not only easy to make but also highly customizable. Whether you’re creating them for a special occasion, a festive holiday treat, or simply because you love homemade candy, these gumdrops will bring joy to your kitchen.
### Conclusion: A Sweet, Nostalgic Treat for All Ages
Homemade gumdrops are a perfect treat for candy lovers of all ages. With just a few ingredients and some patience, you can create chewy, flavorful gumdrops that rival any store-bought version. Customize them with your favorite flavors and colors, or even experiment with creating different textures and coatings. Whether you’re sharing them with friends and family or keeping them all for yourself, these homemade gumdrops will quickly become a favorite in your candy-making repertoire. Happy candy making!
