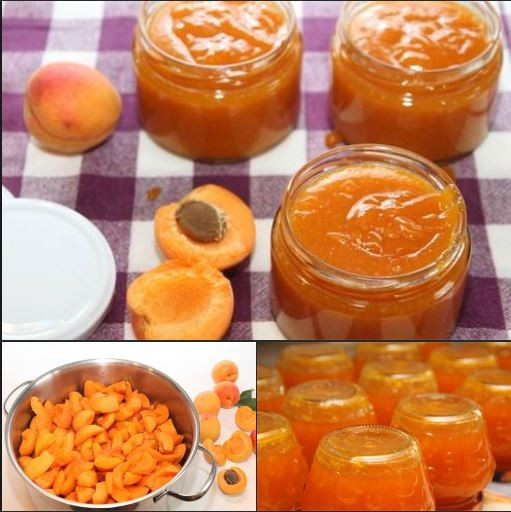
Absolutely! Here’s a clear, inviting article for “Apricot Jam Step by Step” — perfect for a food blog, recipe site, or newsletter.
Apricot Jam Step by Step: A Simple Homemade Delight
There’s nothing quite like the sweet, sunny flavor of homemade apricot jam. Whether spread on warm toast, dolloped over yogurt, or paired with cheese, apricot jam brings a burst of summer goodness any time of year. Making your own jam at home is easier than you think—no fancy equipment required!
Follow this step-by-step guide to create your own delicious apricot jam, bursting with natural flavor and free from preservatives.
Ingredients:
- 2 pounds fresh apricots (about 8–10 medium apricots)
- 4 cups granulated sugar
- 2 tablespoons lemon juice
- 1/2 cup water
Equipment Needed:
- Large heavy-bottomed pot or jam pan
- Sterilized jars with lids
- Wooden spoon or heatproof spatula
- Ladle
- Candy thermometer (optional but helpful)
Step 1: Prepare the Apricots
Wash the apricots thoroughly. Cut them in half and remove the pits. You can chop the halves into smaller pieces if you prefer a chunkier jam or leave them larger for a more rustic texture.
Step 2: Combine Ingredients in the Pot
Place the apricots, sugar, lemon juice, and water into your large pot. Stir gently to mix everything well.
The lemon juice helps the jam set properly and balances the sweetness.
Step 3: Let the Mixture Sit
Allow the apricot and sugar mixture to sit for about 30 minutes. This gives the sugar time to dissolve and helps release the fruit’s natural juices.
Step 4: Cook the Jam
Place the pot over medium heat and bring the mixture to a boil, stirring frequently to prevent sticking or burning. Once boiling, reduce heat to maintain a steady simmer.
Cook for about 20–30 minutes, stirring often, until the mixture thickens. You’ll notice the jam bubbling and becoming glossy.
Step 5: Test the Jam Consistency
To check if your jam is ready, use the classic plate test:
- Place a small spoonful of jam on a chilled plate.
- Let it sit for a minute, then run your finger through it.
- If it wrinkles and holds its shape, it’s done! If it’s still runny, keep simmering and test again after a few minutes.
Alternatively, if using a candy thermometer, the jam is ready at about 220°F (104°C).
Step 6: Sterilize Your Jars
While the jam is cooking, sterilize your jars and lids by boiling them in water for 10 minutes. Let them air dry on a clean towel.
Step 7: Fill the Jars
Once the jam has reached the desired consistency, carefully ladle the hot jam into your sterilized jars, leaving about 1/4 inch of space at the top.
Wipe the rims clean, seal with the lids, and let cool at room temperature.
Step 8: Store and Enjoy!
Store your apricot jam in a cool, dark place. Once opened, keep it refrigerated and enjoy within a few weeks.
Bonus Tips:
- Add a vanilla bean or a cinnamon stick during cooking for a flavor twist.
- For a smoother jam, use an immersion blender before cooking or mash the apricots well.
- Share your homemade jars as thoughtful gifts—they’re always a hit!
Final Thought
Making apricot jam from scratch is a rewarding way to savor the season’s best fruit year-round. With just a few simple steps, you can create a delicious, wholesome spread that brightens breakfast and snacks alike.
Ready to try? Grab those apricots and start your jam journey today!
Would you like me to include printable recipe cards or pairing suggestions for your apricot jam?
