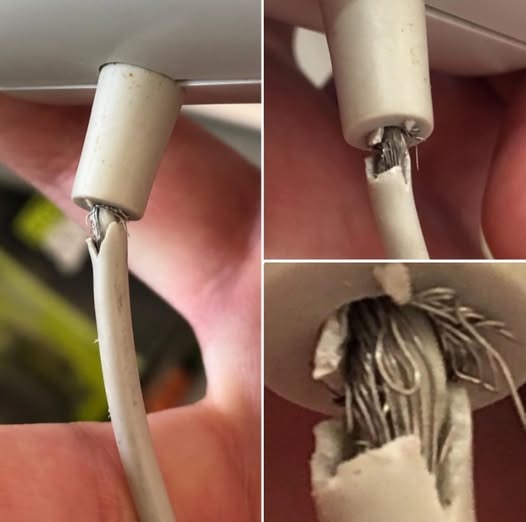
For USB-C cables with many wires or shielding layers, soldering is usually required.
4. Seal the Repair
- Once all wires are reconnected, wrap the repair tightly with electrical tape.
- For a neater, more durable finish, slide a piece of heat shrink tubing over the repair area and apply heat to shrink it snugly around the cable.
5. Test It Out
Plug in your cable to a low-risk device (like a power bank) and see if it charges. Wiggle the repaired area gently to test for weak connections.
🧼 Quick Fix for Frayed but Working Cables
If your cable still works but is starting to split near the connector:
- Wrap it tightly with electrical tape to prevent further wear.
- Add a spring from an old pen or use paracord for reinforcement.
- Consider a cable protector wrap (widely available online).
These methods won’t fix broken wires but can extend the life of a fraying but functional cable.
🧠 Pro Tips
- Avoid using excessive heat — it can melt or damage the internal wires.
- Never tape over a melted or burned section. If it smells like burning or feels hot, discard the cable safely.
- For critical repairs (like MacBook or high-power charging cables), consider replacing instead of repairing — safety comes first.
🌍 Final Thoughts: Don’t Toss It Just Yet
Repairing a phone cable may seem minor, but small actions like this can lead to big savings and a lighter environmental footprint. With just a bit of time and the right tools, you can breathe new life into a cable you thought was done for.
A broken cable doesn’t always mean a trip to the store — sometimes, it just needs a little DIY care.
Would you like a printable repair checklist or a visual diagram to go with this guide? Let me know — I’d be happy to create one!
