ADVERTISEMENT
🥖 Why No-Knead Bread Works
Traditional bread recipes rely on kneading to develop gluten, the protein network that gives bread its structure. But this no-knead method skips that step entirely.
Instead, time does the work for you. The dough ferments slowly, allowing the gluten to form naturally — which results in a beautifully chewy texture and deep, complex flavor. It’s hands-off baking at its best!
🧂 No-Knead Bread Recipe (with 3 Cups of Flour)
Ingredients:
- 3 cups all-purpose flour (or bread flour)
- 1½ teaspoons salt
- ½ teaspoon instant yeast (or active dry yeast)
- 1½ cups warm water (about 110°F / 43°C)
- 1 tablespoon honey (for a touch of sweetness)
- 1 teaspoon olive oil (for extra softness)
- Seeds, herbs, or chopped nuts for texture
Instructions:
1. Mix the Dough
In a large bowl, whisk together flour, salt, and yeast. Pour in the warm water (and honey or oil if using). Stir with a wooden spoon or spatula until a shaggy, sticky dough forms.
👉 Don’t worry — it won’t look smooth or perfect. That’s exactly right.
2. Let It Rest
Cover the bowl with plastic wrap or a clean towel and let it rest at room temperature for 12 to 18 hours.
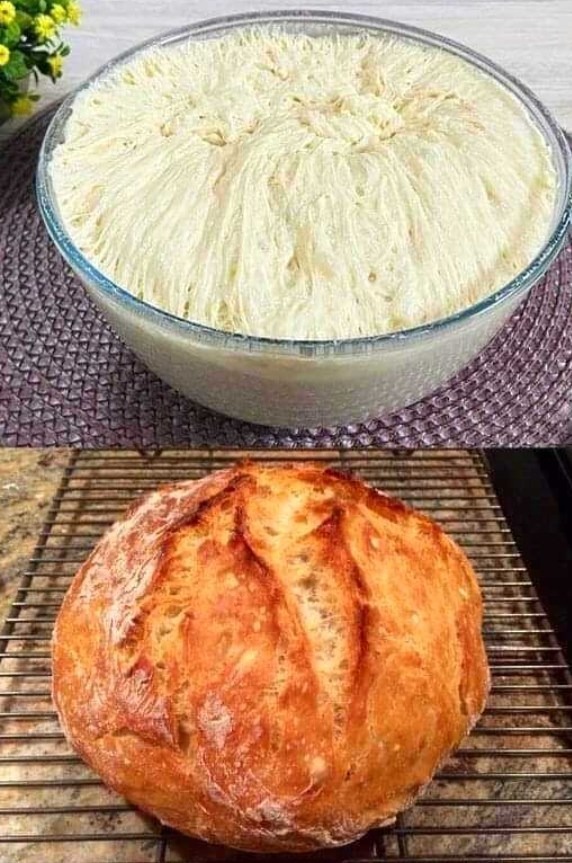
During this time, the dough will rise, bubble, and double in size — that’s the yeast and gluten doing their magic.
3. Shape the Dough
After resting, the dough will be sticky and soft. Lightly flour your hands and a work surface, then gently shape it into a round ball.
Place the dough on parchment paper, sprinkle a little flour on top, and let it rest for another 30 minutes while you preheat your oven.
4. Preheat the Oven
Place a Dutch oven (with lid) into your oven and preheat to 450°F (230°C). Heating the pot creates the steamy environment that gives no-knead bread its signature crispy crust.
5. Bake
Carefully remove the hot pot, place the dough (on parchment paper) inside, cover, and bake for 30 minutes.
Then remove the lid and bake for another 10–15 minutes, until the crust is deep golden brown.
6. Cool and Enjoy
Let the bread cool on a wire rack for at least 30 minutes before slicing. (We know — it’s tempting, but worth the wait!)
🌾 The Result
You’ll end up with a beautiful artisan-style loaf — crisp on the outside, tender on the inside, and full of rich, homemade flavor. The best part? You did it with just three cups of flour and almost no effort.
It’s perfect for:
- Dipping in olive oil or soup
- Toasting for breakfast
- Making the best grilled cheese of your life
-
ADVERTISEMENT
